
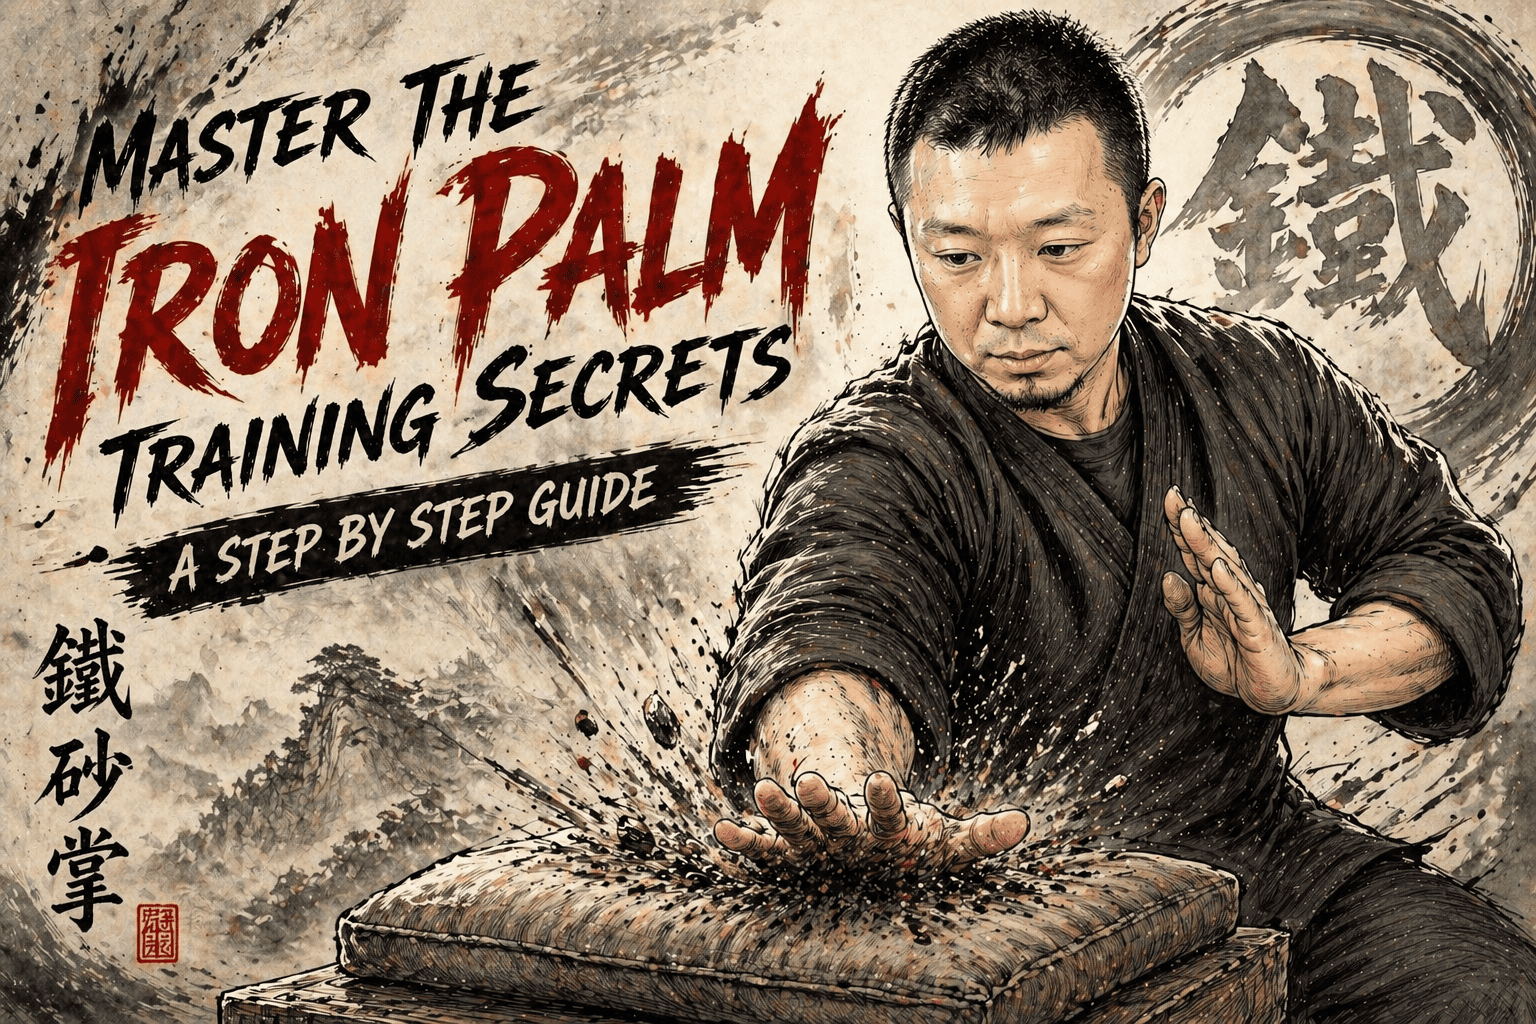
Iron Palm (鐵砂掌) is a renowned martial arts technique known for its formidable power. Upon mastery, it is said that one can shatter bricks and stones with a single strike, making it an excellent self-defence and offensive technique. Various martial arts schools have practitioners of Iron Palm, but the training methods vary greatly due to differences in skill and expertise.
In modern times, there are several ways to train in Iron Palm, including hitting sandbags with the palm, hitting tree trunks with the palm, hitting stacks of paper with the palm, and hitting beans placed in barrels with the palm. The main feature of Iron Sand Palm is the hardening of the palms through rigorous and grueling training, enabling the practitioner to overpower their opponents.
However, such intense training can have negative impacts on the body, causing the muscles and fascia to become stiff and leading to ailments in old age. Some training methods are also complicated and time-consuming, requiring decades of practice to achieve any level of proficiency, and if not accompanied by expensive supplements, they can easily be damaged by toxins, causing weakness and sickness or even endangering one's life through internal injury.
Pre-course Preparation
- Iron Sandbag: A rectangular cloth bag made of two layers of thick cloth, about 34 cm long and 28 cm wide, filled with chick peas or mung beans. The sandbag should leave a slight gap and should not be too full.
- Stool: Prepare a stool with a height of about two inches below the navel when standing upright. Place the sandbag on top for training.
- Hand wash solution: Either Wood Lock oil, Red Flower oil or Dit Da Jow (跌打酒) can be used. You can buy them on Amazon.
Training Methods
Prepare the Stance - Place the sandbag on the stool and stand in a high horse stance to the side of the bag, with both hands placed at the waist. Clear the mind of all distractions. Relax the body naturally, breathe naturally, and sink the Qi to the Dan Tian (lower abdominal area). After a moment of relaxation and calm, begin training according to the method. (Figure 1)

The Slapping Method - lift the hand to the level of the eyebrows or slightly higher, relax the shoulder and arm. The hand should fall freely into the sandbag as if it were a free falling object, with the intention of explosive power emanating from the palm centre and bursting on the sandbag. The whole palm should be slapped on the sandbag, but be careful not to use too much force. (Figures 2)

The Throwing Method - connect with the previous move. Lift the hand to the level of the eyebrows or slightly higher, and relax the shoulder and arm. The hand should fall freely into the sandbag as if it were a free falling object, with the intention of explosive power emanating from the back of the hand and bursting on the sandbag. Be careful not to use too much force and do not curl the fingers out of fear or pain. (Figure 3)

The Cutting Method - connect with the previous posture. Lift the hand to the level of the eyebrows or slightly higher, relax the shoulder and arm. The hand should fall freely into the sandbag as if it were a free falling object, with the intention of explosive power emanating from the side of your palm and bursting on the sandbag. Be careful not to use too much force. (Figure 4)

The Stamping Method - Connect to the previous posture. Lift the hand to the level of the eyebrows or slightly higher, relax the shoulder and arm. The hand should fall freely into the sandbag as if it were a free falling object, with the intention of explosive power emanating from the bottom of the hand and bursting on the sandbag. Be careful not to use too much force. (Figure 5)

The Dotting Method - connect with the posture. Lift the hand to the eyebrows or slightly higher, five fingers together like a hook, relax the shoulder and arm. The hand should fall freely into the sandbag as if it were a free falling object, with the intention of explosive power emanating from the finger tips and bursting on the sandbag. Be careful not to use too much force. (Figure 6)

The above five techniques form a set, practice for a total of 10 minutes per day, do not overdo it.
Breathing Methods
During Iron Palm training, reverse breathing should be used. The principle is: inhale through the nose while raising the palm, exhale suddenly through the nose when striking the palm, and quickly expand the abdomen. At the beginning, the breathing should not be too strong, and the amount of breathing should be gradually increased until it can be adapted. The correct use of breathing during the practice of Iron Palm plays a very important role in improving the efficiency of breathing, maintaining the basic constant environment inside, fully exerting various energies of the human body, and at the same time, it also plays a very important role in stably exerting good technical level and powerful killing power.
Training Schedule
- For the first 60 days, train for 10 minutes per day.
- For the next 20 days (days 61-80), train for 15 minutes per day.
- For the following 20 days (days 81-100), train for 20 minutes per day.
- It is best to continue practicing after 100 days.
Train once a day at a set time or twice a day, once in the morning and once in the evening, but the total time should not exceed the specified time. After training, massage one hand and then train the other hand. It is also possible to train only one hand, but the total time should still be within the specified time.
Key Points
Basic Posture and Techniques
Bend your knees slightly and squat down, but do not let your knees go beyond your toes. When hitting the sandbag, the point of impact for your hand should be at the centre of your body, with your eyes focused on the middle of your hand. When hitting, relax naturally and avoid using brute force. Keep your breath sunken in your lower abdomen and swing your palm like a whip. When using the palm, palm fingers, or bottom of hand to hit, naturally spread your fingers and be agile with your fingertips. When using the side of the palm to hit, keep your fingers close together and straight. When using your fingertips to hook and hit, keep your fingers close together. When hitting with your right hand, keep your left hand in a fist and place it at your waist.
Relaxation
When practicing Iron Palm, you must first learn to relax. Relaxation refers not only to the physical body, but also to the mind. Only by relaxing the mind can we better relax the limbs and internal organs. During training, eliminate all personal thoughts and distractions, calm the mind and focus the spirit, so that we can better tap into the body's potential.
Mindset and Focus
During the training process, one should concentrate and focus, keeping their gaze level and attentive at the sandbag. If the mind is not focused and the eyes are not on the target, the intention will be divided. When the intention is divided, power and strength will become scattered and unable to be generated.
Head Position
During training, the basic requirement for the head is to maintain a straight and upright position, not tilted forward or backward, not tilted to the left or right, and looking straight ahead as if there is a rope slightly lifting the head. First, the head and neck must be relaxed, with the line connecting the Baihui (百會穴) and Huiyang (會陽穴) pressure points being perpendicular to the ground. Proper head movement can have a good effect on the nervous and movement systems of the person. Keeping the head upright and relaxed is conducive to the circulation of Qi and blood, and improves the activity function of the nervous system. The control of intention using a certain internal energy most not be achieved with brute force, otherwise the head and neck will become stiff, affecting the effectiveness.
Shoulder and Elbow Position
Sinking the shoulders and dropping the elbows is a requirement for the Iron Palm technique, and is an important principle of training. The shoulders are the pivot point for the arms, and the effectiveness of the arms depends on the shoulders. If the shoulders are relaxed, the arms will be active and the strength will easily reach the palms, which is more conducive to breathing in the lungs. Sinking the shoulders not only means sinking down, but also includes relaxation, which is the key to dropping the elbows.
The role of sinking the shoulders is to promote the formation of an upward and downward pulling and balance of energy between the thoracic and Bai Hui (百會穴) pressure point after the shoulders sink down. If the shoulders are raised or strained or not relaxed during practice, not only will make Qi and blood difficult to pass through the elbows and hands, but it will also seriously affect the flexibility of the upper limbs.
The elbow is the intermediate joint that is connecting the root and manipulating the terminal, and if the elbow strength is incorrect, the whole upper limb strength will be difficult to generate. The Iron Palm technique requires the elbows to droop and not be lifted or protruded outward. Sinking the shoulders and dropping the elbows are beneficial for the blood vessels in the surrounding tissue. Especially the flow of blood in the coronary artery, which is beneficial for the circulation of blood throughout the body and makes the Iron Palm technique more smooth and powerful.
Chest Position
During practice, relax the chest muscles and do not stick out your chest. This is done while holding the chest in, allows the chest and back to stretch naturally, which is beneficial for the circulation of Qi and blood in the chest and back.
When the Qi and blood flow smoothly and comfortably in the chest and back, it also helps to promote the return of venous blood to the heart and enhance circulatory function. Back pulling can also adjust the activity of the thoracic vertebrae in the spine, allowing the spine nerves to be well trained.
In the chest and back posture, it is important to note that whether you are holding your chest or pulling your back, you should follow naturally and use your mind without force. Otherwise, not only will it be harmful for blood circulation, but it will also greatly suppress the heart and lungs and affect their normal functioning. When the chest and back are relaxed, the rest of the body also relaxes, and during practice, one can follow naturally and the moment of force can be advantageous from the spinal cord.
Waist Position
The waist is very important in the practice of Iron Palm. The waist is the pivot of the body's upper and lower connection and rotation, and also the source of a person's strength and power. The waist plays a crucial role in the body's movements, regulating the stability of the body's centre of gravity and the storage of dominant force. The requirement for the waist in Iron Palm is to be relaxed, sunken, and straight. During practice, the waist should be relaxed and sunken first, so that Qi sinks to the Dan Tian. In the relaxation and sinking, the waist is also required to be straight.
Stances
In Iron Palm training, the main requirements for the hip joint are looseness, contraction, and closure. Looseness refers to relaxing the hip joint. Loosening the hip joint cannot be sought in the open stance. If the stance is too open during training, it will inevitably result in an uncoordinated stance, an uncoordinated hip joint, and unstable lower limbs. Therefore, the hip joint must be relaxed within the limits of the required regulations. However, the stance should not be too narrowed as well, which will affect the opening and movement of the spinal joint. At the same time, the biggest disadvantage of a narrowed stance is the instability of the lower limbs. The correct looseness of the hip joint should be carried out in a stance slightly wider than your shoulder width but narrower than a horse riding stance. This makes the hip joint open, natural, comfortable, and stable.
Knee Position
The knee joint is one of the heaviest and most active joints in the human body, so it is also an important link in determining the size of the force. During training, the knee joint should be relaxed to facilitate the passage of Qi and blood. While relaxing the knees, they should be slightly tucked in, not open outward.
Feet Position
The effectiveness of the force is based on the stability and flexibility of the foot. While training Iron Palm, one foot should be solid and one foot should be light. Light does not mean weak and solid does not mean complete stillness, the spirit should be present in the solid leg. When training Iron Palm, the striking hand needs slight force and firmness from the matching foot.
Try Yourself
After 100 days of training in the Iron Palm technique, you should have developed stronger attacking power. Now you can test your progress through the following methods, which will allow you to experience the joy of success and encourage you to confidently continue your training.
We suggest using green or red bricks for testing. Of course, you can also use roof tiles or cedar boards, but bricks are easier to obtain.
First, choose bricks that are not too strong, so that you can easily build confidence with a successful strike. Later, you can gradually increase the number and strength of the bricks to challenge yourself. Place the bricks as shown in Figure 1-12 and break them with the bottom of your hand, then try to chop them with the side of your palm. The key to chopping is to concentrate, strike the centre of the object, pull back suddenly with the back hand, twist the waist, maintain balance while striking, and have strong rooting below the waist.
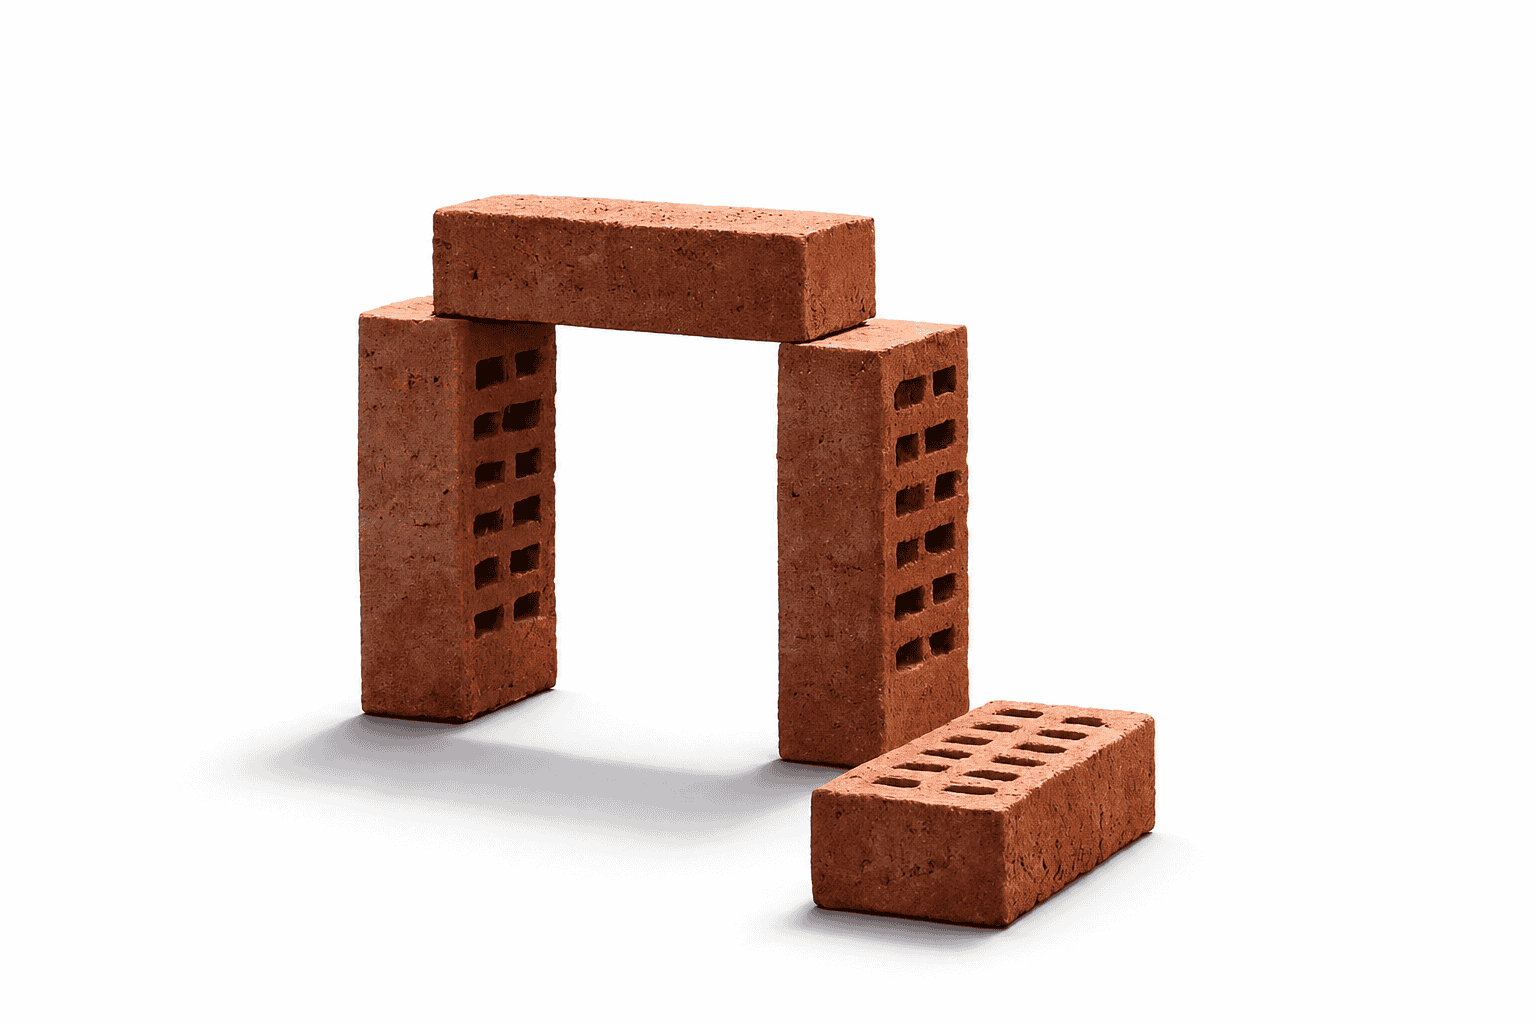
The height of the brick placement should be as close to the Dan Tian area as possible. When starting the test, place a thin book or magazine on the brick surface to prevent rough brick surface from damaging your hands and to reduce the initial fear of facing the brick for the first time. When proficient, this can be removed.
During the test, first set up the stance, inhale and gather energy through the nostrils as if pulling a bow, and then suddenly exert force and fiercely strike the centre of the brick with the abdomen and underarms.
If testing the brick by holding it in the hand, slightly raise the hand holding the brick and it can be broken with the bottom of your hand. During the test, pay attention to using the full body's strength and quickly strike with full force. Have the belief that a strike will shatter, and never hold back due to fear of injury. Strike and then retreat, be sharp and decisive. After breaking one brick, gradually add more and try to strike with the bottom of your hand as much as possible.
Source: Wang, H (2006). A Quick Guide to the Hard Skills of Martial Arts. People's Sports Publishing House. Translated by Simon Wang.